1
Open the analysis window
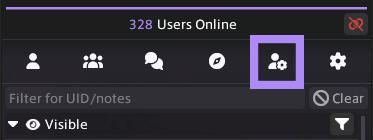
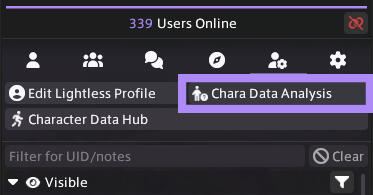
Open your Lightless window and find the small icon that looks like a person with a gear beside them. Click the button that says Chara Data Analysis.
Before you walk in
Our shell carries the mods worn across our venues. Lightless Sync and PlayerSync share the same one, so whichever you run, these are your details. Then take ten minutes to compress yourself, and nobody in the room drops a frame because of you.
The shell is emptied every week so there is always room for someone new. If you come often, ask to be pinned in our Discord and you will be left in across the clear.
This is what everyone standing near you has to pull down before they can see you at all. Compressing your textures is what brings it down, and it costs nothing in looks.
A vanilla character sits between 5k and 20k. A built one usually lands around 350k. Past 500k you start getting warnings raised about you, and people pause you to save their own frames.
You compress a mod one time and it stays compressed. Ten minutes now, and you never think about it again unless you install something new.
The buttons are named differently in each plugin, so follow the one you actually run. This is Lightless Sync.
Open your Lightless window and find the small icon that looks like a person with a gear beside them. Click the button that says Chara Data Analysis.
Click Start analysis (missing entries). Your current size is shown here too. Write it down, you will want to compare at the end.
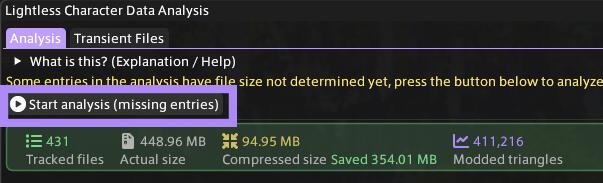
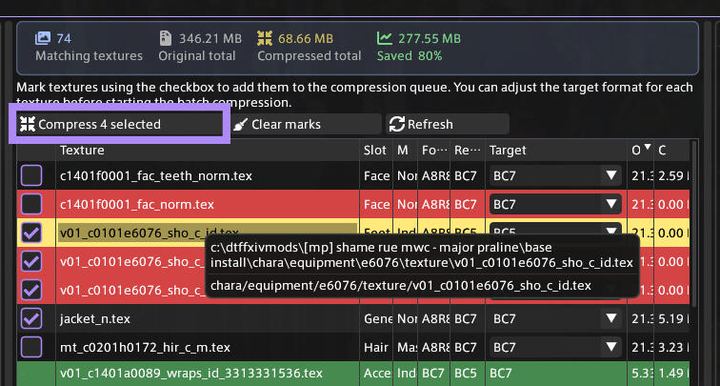
The middle of the window lists your mods, with the texture path and the slot each one affects.
Hover the path in the Texture column to find out which mod it belongs to.
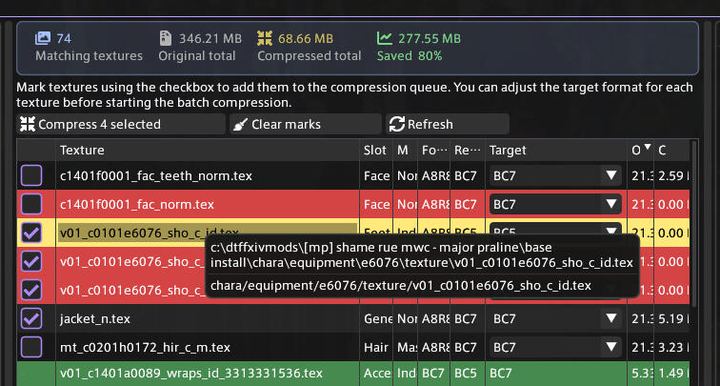
Compress every clothing mod. That is where nearly all of your weight is, and nobody will ever see the difference.
Hair, skin, scales and face are your call. Leave the detailed ones alone: a sculpt loses too much.
Once your selection is made, click Compress xx selected. It takes a few minutes.
Run the analysis at the top again and compare with the figure you wrote down. Aim for under 500 MB.
Compressing brings the megabytes down, never the triangles. If your triangle count is still high, open Models in the same window and use Model Decimation at the default 80 percent.
.pmp or .ttmp2
so you can reinstall anything that comes out wrong.
Written from the guide by Fawn, whose original lives at compressyourself.carrd.co. Screenshots are hers.
PlayerSync compresses on its own server as well, but that does nothing for the memory your own machine spends on you. This does.
Type /psync in game chat to open the plugin.
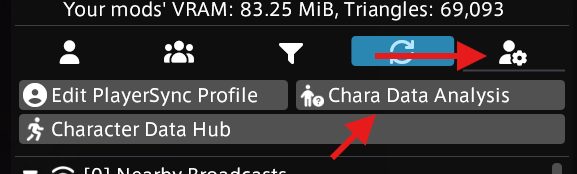
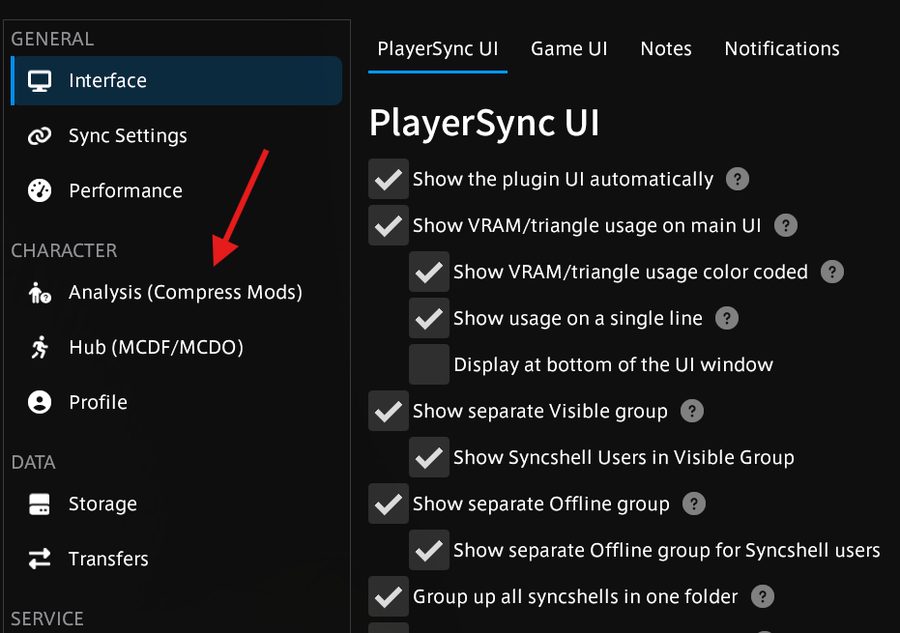
You can reach the analysis screen two ways, from the top bar of the main window or from the settings. Both land in the same place.
Click Start analysis. It reads everything you are currently wearing and tells you what it costs in video memory. Note the figure, you will compare at the end.
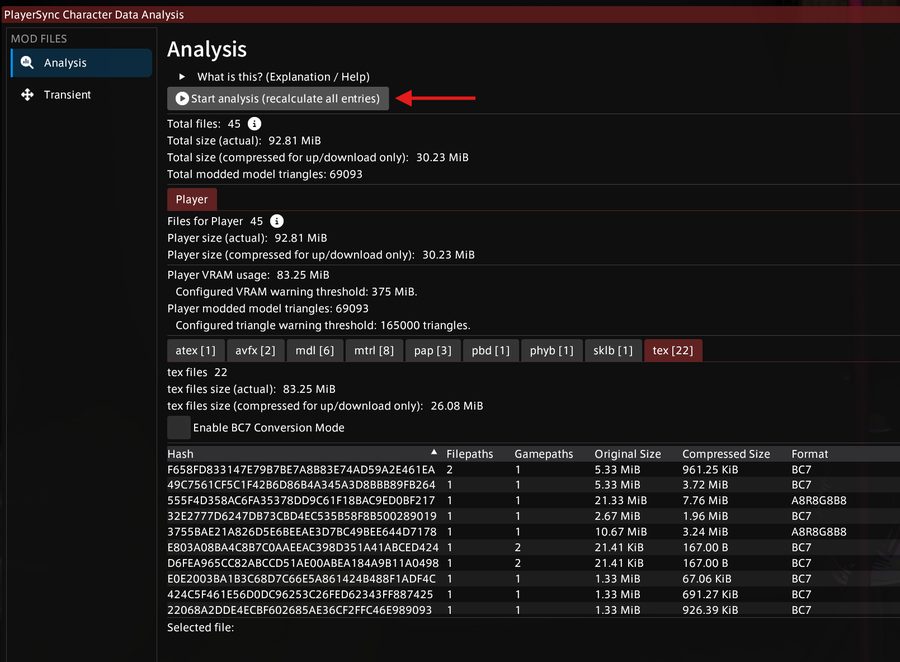
Open the tex tab to list every texture you are carrying. Click a file hash to see which mod it belongs to, so you know what you are about to touch.
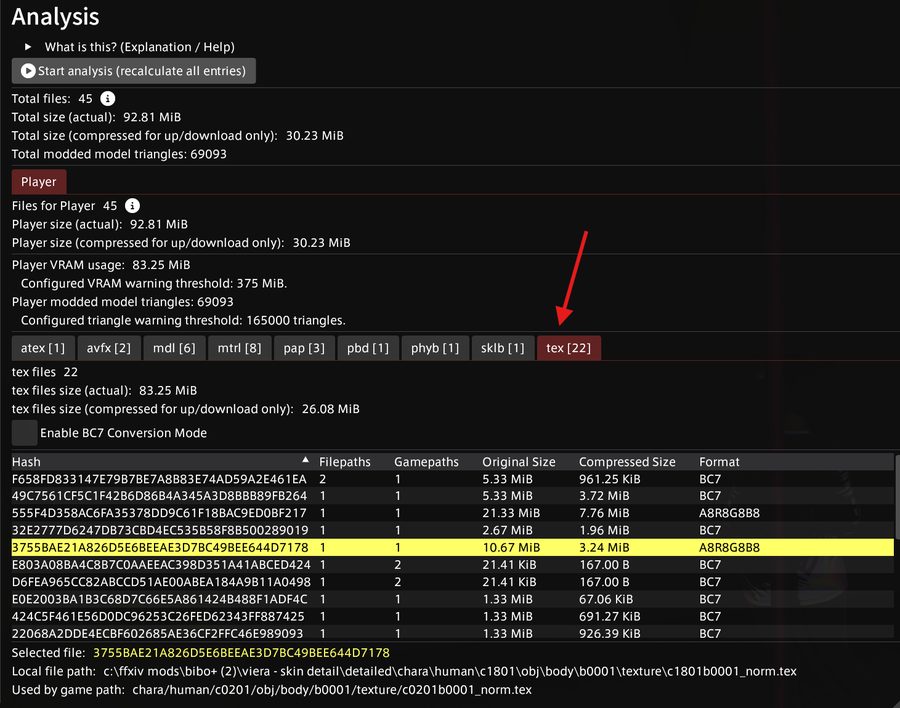
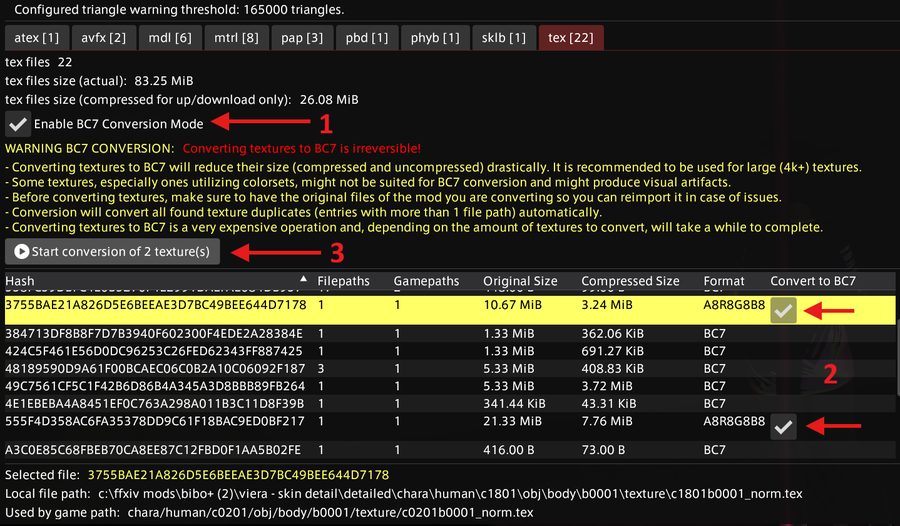
Not every texture can be converted. Look for the A8R8G8B8 ones first, that is where nearly all the savings are.
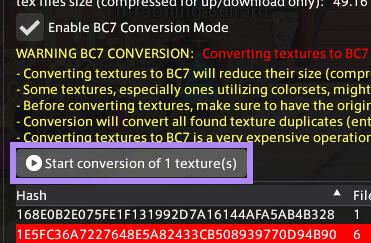
Tick Enable BC7 Conversion Mode, tick each texture you want, then click Start conversion.
.pmp, .ttmp2) so you can reload it into
Penumbra if something comes out wrong. Colorsets and heavy
transparencies are the ones that sometimes do.
Once the conversion is done you may see a lot of red files. That is normal. Click Start analysis at the top again for a fresh, accurate count.
Aim for under 500 MB and under 500k triangles. Compressing brings the megabytes down but never the triangles: those come from the model itself, so a mod still heavy after this has to be swapped for a lighter one.
Written from the PlayerSync documentation. Screenshots are theirs.
A MCDF is a snapshot of how your character looks right now, saved as one file. Send it to someone and they can load you straight into GPose without you being online. This is the PlayerSync route.
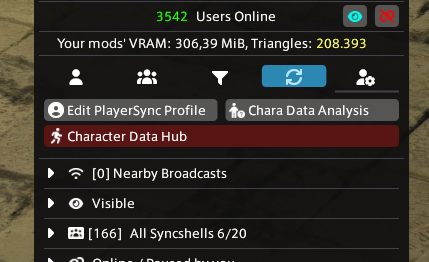
Type /psync, then click the icon on the right that
looks like a person with a gear.
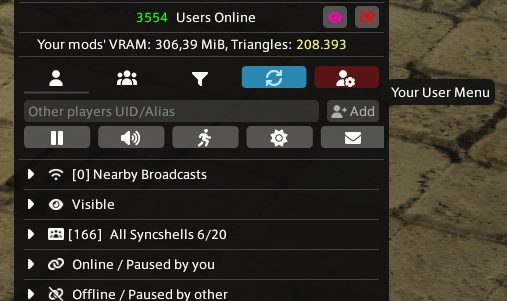
Click the long Character Data Hub button that appears under the icon. It can open collapsed in a corner of your screen, so if nothing seems to happen, go looking for it.
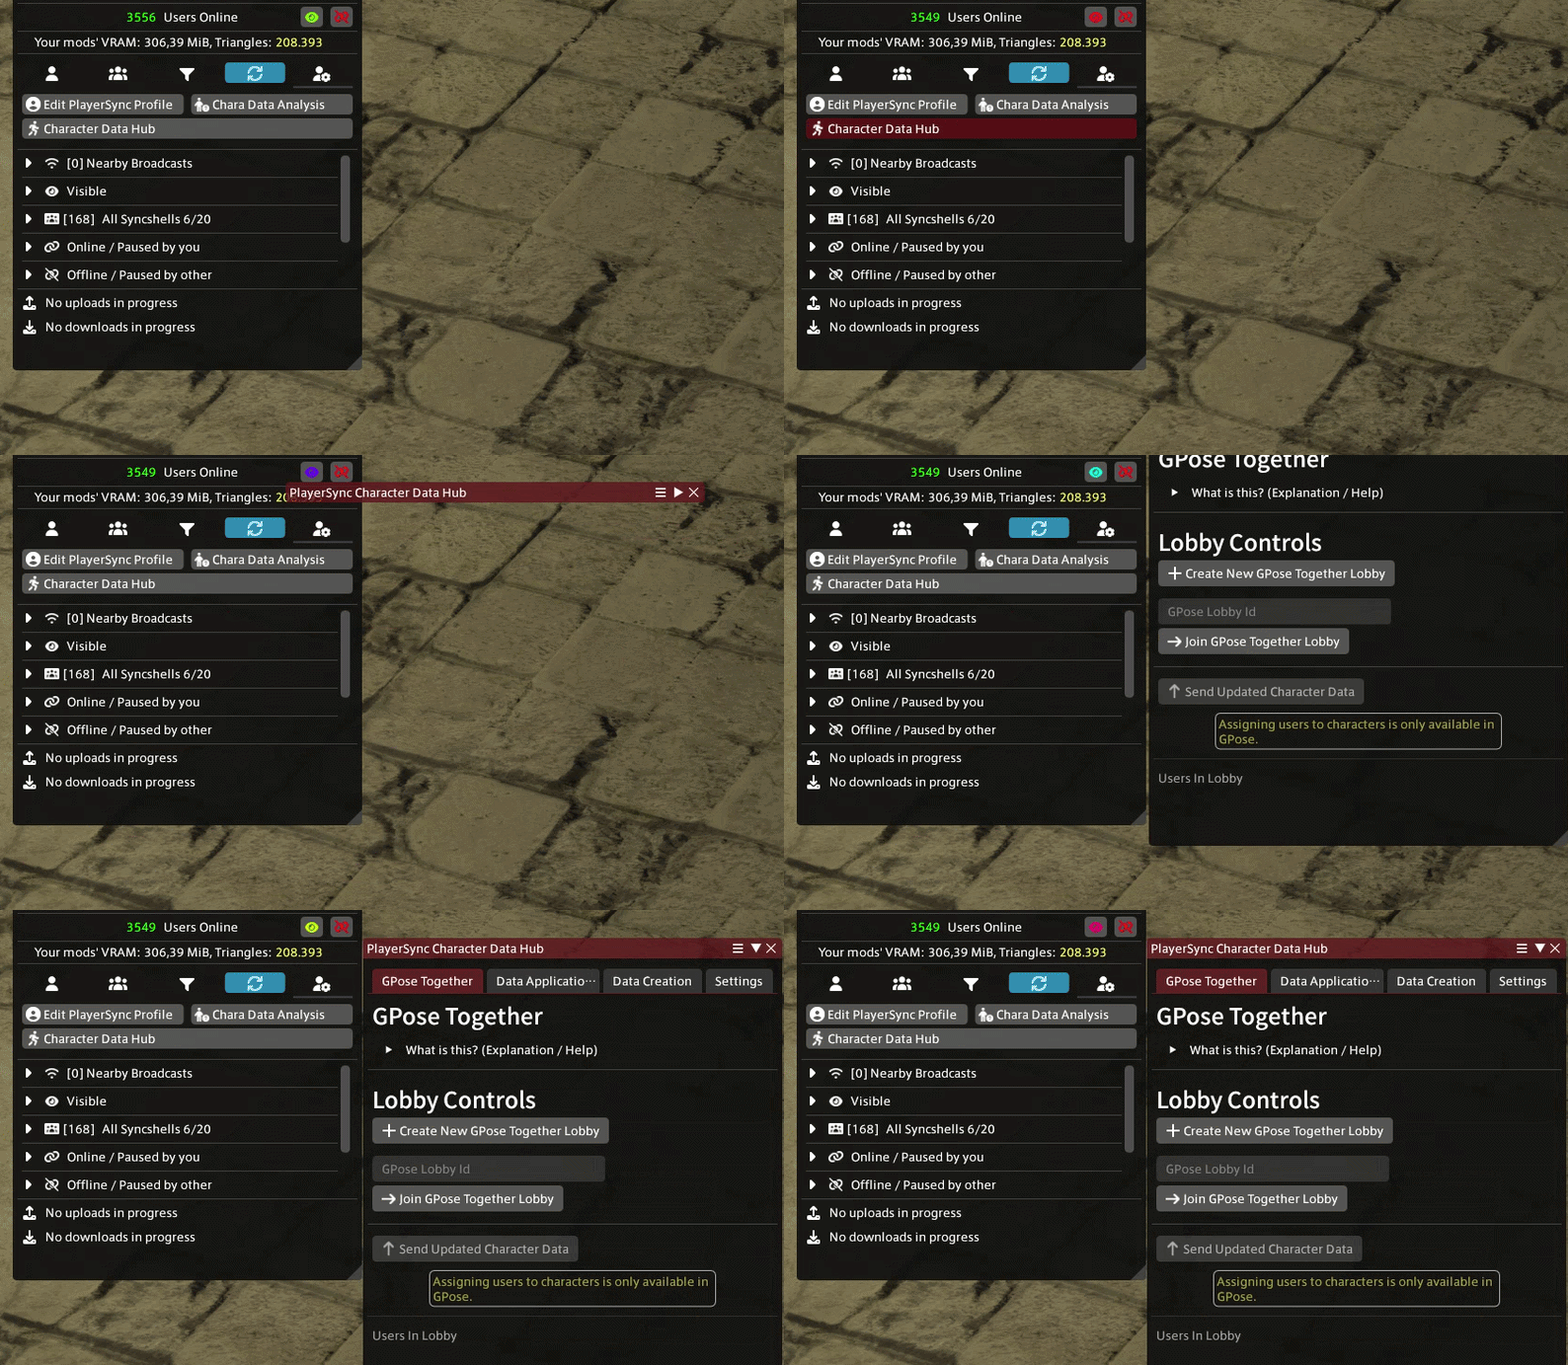
Open the Data Creation tab. You are offered MCD and MCDF. Take MCDF, that is the one you can hand to someone else.
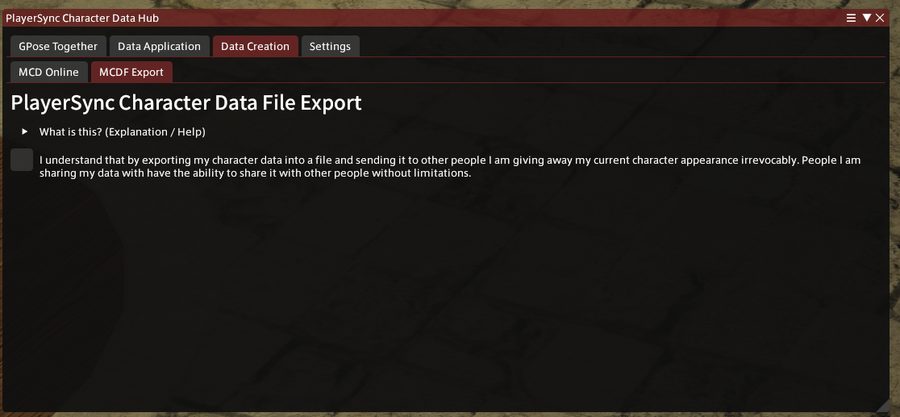
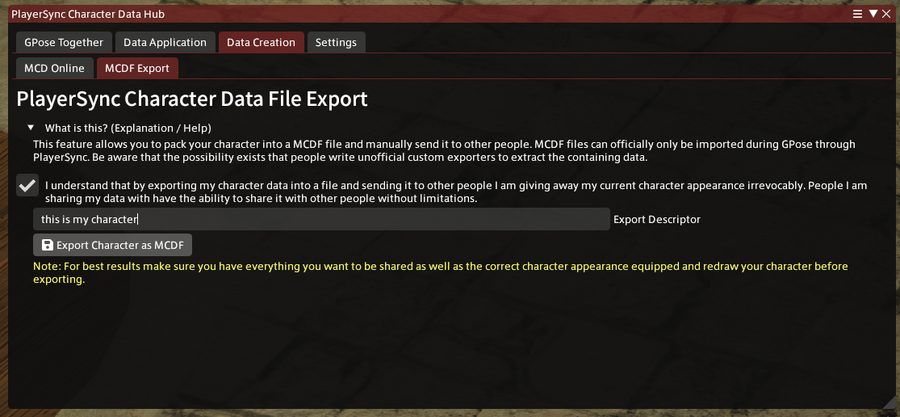
Open the What is this? dropdown and agree to the terms. Write a short description of the look, so whoever receives it knows which one it is, then click Export Character as MCDF.
It saves you exactly as you are at that moment, so put your outfit on first.
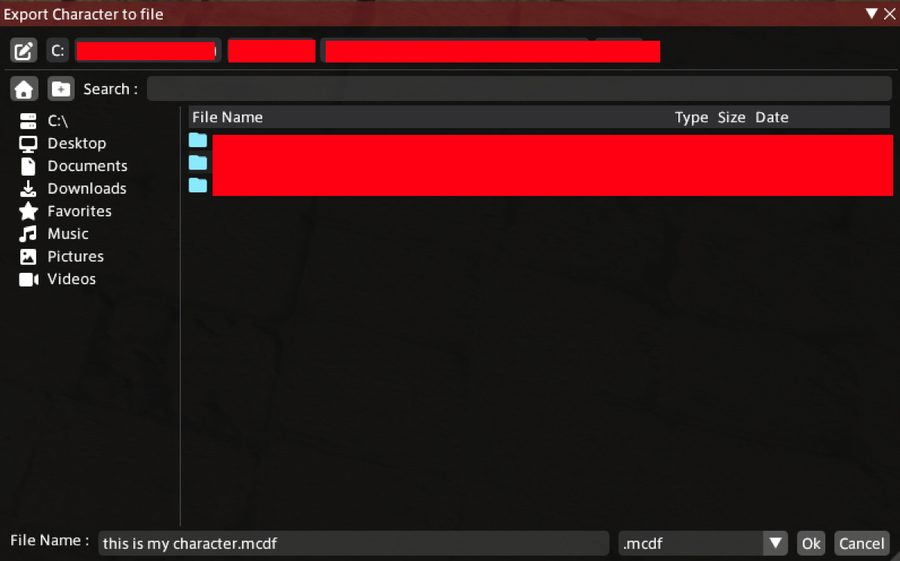
One last window asks where to save the file. Choose somewhere you will find again, then send it over.
Written from the PlayerSync documentation. Screenshots are theirs.
Joining the shell means accepting these.